guys as the project i am currently working on is based on IOT(internet of things) here are the basics of interfacing a esp8266wifi module with an Arduino and getting started.
To start with here’s what I did:
refer the pin out diagram for connections.
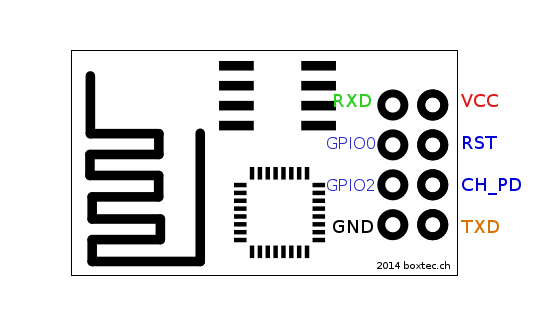
connections:
Esp8266 Arduino
- rx—————rx
- tx—————tx
- chpd———–3.3v
- vcc————-3.3v
- gnd————gnd
yes the usual is to connect rx wit the tx of Arduino and vice versa in my case it worked the way I connected.
After the connections are done power up the Arduino board.
Now open the serial monitor from the Arduino IDE and set the baud rate to 115200 and NL&CR i.e new line and carriage return.
Great now interract with your esp8266 module…use AT commands for the same: you will find many such examples and the command list online just google it.
This module proves to be a cheap alternative to the arduino wifi shield.
You can do lots of stuff using the esp8266 and Arduino. For example
- Use as Server
- Use as access point
- Send data to webpages(useful for IOT)
- host data
- connect to your home network and send and receive data.
I am posting some images for reference where You will find how used the at commands and interacted with the module.
In the images I used Telnet at some point to send and receive data.If You are using windows YOu have to enable Telnet in the command prompt more information HOW TO ENABLE TELNET.
Enjoy playing with your esp8266 and make awesome IOT based projects.


